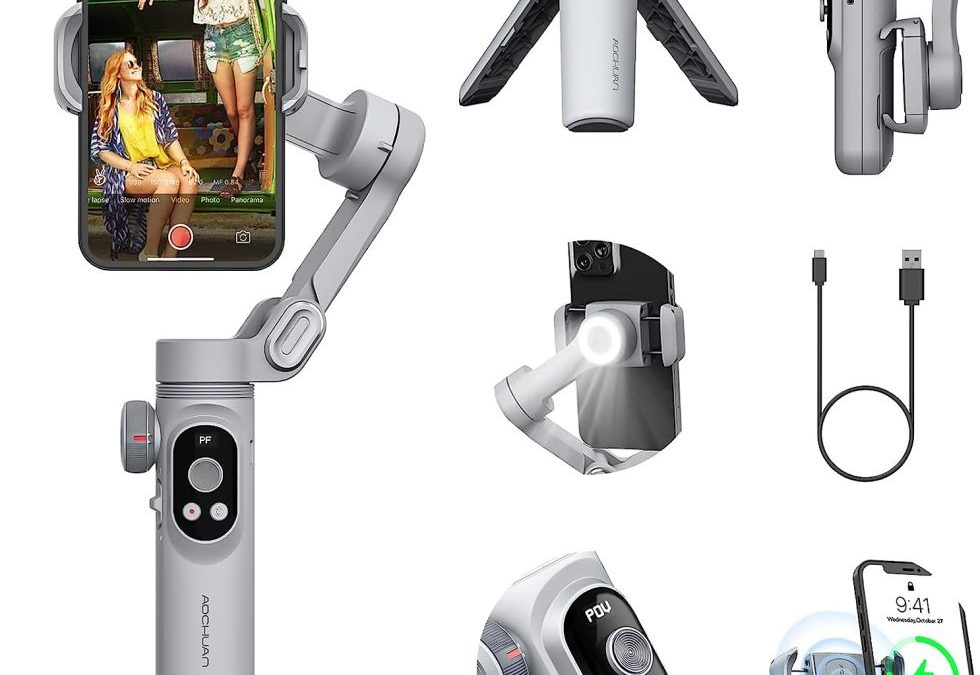
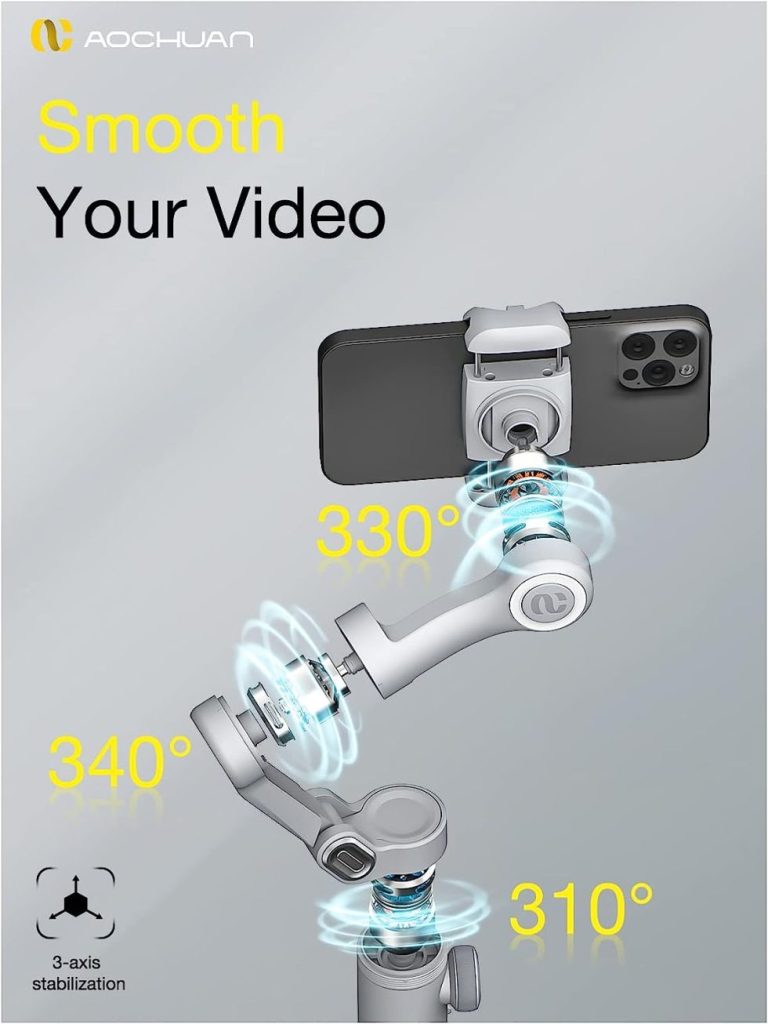
Les stabilisateurs à cardan 3 axes contrent les vibrations indésirables de l'appareil photo à l'aide de trois axes motorisés : panoramique, inclinaison et roulis. Contrairement aux cardans traditionnels qui reposent uniquement sur des contrepoids, ces appareils intelligents utilisent des capteurs et des algorithmes pour vous maintenir parfaitement en équilibre lorsque vous vous déplacez. La clé pour obtenir des images fluides est de maîtriser la façon dont ces trois axes fonctionnent ensemble pour compenser les différents types de tremblements.
Les photographes professionnels décrivent souvent le stabilisateur à cardan 3 axes comme étant doté de "muscles électroniques" qui font le gros du travail à votre place. L'axe d'inclinaison vous maintient à niveau lorsque vous avancez. L'axe de roulis empêche toute inclinaison indésirable lorsque vous effectuez un panoramique latéral. Et lorsque vous effectuez un mouvement circulaire, les trois axes travaillent ensemble pour éliminer les tremblements.
L'équilibre parfait : La pierre angulaire d'une prise de vue fluide avec un stabilisateur à cardan 3 axes
Avant de mettre en marche le stabilisateur à cardan 3 axes, il est essentiel d'effectuer les réglages d'équilibre appropriés. Tout d'abord, desserrez le bouton de réglage, ajustez l'axe d'inclinaison et réglez l'appareil photo de manière à ce qu'il reste à l'horizontale lorsque vous le desserrez. Ensuite, réglez l'axe de roulis jusqu'à ce que la caméra ne s'incline ni à gauche ni à droite. Enfin, équilibrez l'axe panoramique pour vous assurer que la caméra ne tourne pas lorsque vous la faites pivoter de 45 degrés.
Un conseil de pro peu connu : une fois que vous avez atteint l'équilibre de base, poussez doucement chaque axe pour voir si l'appareil photo peut revenir au centre. Si c'est le cas, procédez à des ajustements mineurs. De nombreux professionnels conservent un petit niveau à bulle dans leur boîte à outils pour vérifier que l'appareil est parfaitement équilibré. N'oubliez pas que même un léger déséquilibre peut forcer les moteurs à fonctionner en surrégime, ce qui peut réduire la durée de vie de la batterie et créer des micro-vibrations susceptibles de gâcher une prise de vue fluide. Consacrez cinq minutes supplémentaires à l'équilibrage de l'appareil : c'est crucial.
Maîtriser les mouvements d'un stabilisateur à cardan 3 axes
Les photographes les plus fluides intègrent Stabilisateurs à cardan 3 axes Le gimbal est un prolongement du corps de l'individu. Tenez-vous debout, les pieds écartés de la largeur des épaules, les genoux légèrement fléchis et le cardan proche de votre centre de gravité. Lorsque vous marchez, déplacez-vous comme un ninja, en vous déplaçant du talon aux orteils d'un pas souple et délibéré. Imaginez que vous tenez une tasse de café pleine dans la main et que vous ne voulez pas la renverser.
Pour obtenir des prises de vue en travelling très fluides, les photographes professionnels utilisent une technique appelée "marche en crabe", qui consiste à se déplacer latéralement en pliant les genoux tout en gardant le haut du corps complètement immobile. Lorsque vous effectuez un panoramique, utilisez tout votre corps, et non vos bras, pour diriger le mouvement. Le secret : le contrôle de la respiration. De nombreux photographes retiennent inconsciemment leur souffle pendant une prise de vue, ce qui provoque des tensions et, en fin de compte, des images tremblantes. S'entraîner à respirer lentement et régulièrement tout en utilisant un cardan à trois axes peut améliorer considérablement la fluidité de vos images.
Optimisez les réglages en fonction des différents scénarios de prise de vue.
Moderne Cardans à 3 axes offrent une variété de modes de fonctionnement qui peuvent améliorer de manière significative la qualité de vos images. Les modes les plus courants sont les suivants :
- Mode verrouillé : Tous les axes restent fixes, ce qui est idéal pour les prises de vue en ligne droite.
- Mode suivi : Le panoramique suit vos mouvements et l'axe d'inclinaison reste horizontal.
- Mode POV : Les trois axes peuvent se déplacer librement pour des prises de vue dynamiques et immersives.
Pour les prises de vue à pied, de nombreux professionnels préfèrent un mode hybride : Le panoramique et l'inclinaison sont en mode suivi, et l'axe de roulis est verrouillé. Lors de prises de vue en contre-plongée, vous pouvez inverser la poignée pour passer en "mode suspension" afin de réaliser des prises de vue plus stables près du sol. Réglez la puissance du moteur en fonction de la charge : un moteur trop puissant entraînera des mouvements saccadés, tandis qu'un moteur trop faible aura une réponse lente.
Techniques avancées de lissage avec un cardan 3 axes
Une fois que vous aurez maîtrisé les bases, essayez ces conseils de pro pour améliorer vos images :
- Effet de flottement : Réduire légèrement la force du moteur pour créer un mouvement de caméra élégant et flottant.
- Mouvement de parallaxe : Combinez un mouvement vers l'avant avec un léger panoramique pour créer de la profondeur.
- La photo secrète : Rapprochez-vous de votre sujet, puis reculez doucement et inclinez vers le haut.
De nombreux professionnels utilisent un moniteur externe monté sur un cardan 3 axes pour mieux cadrer les prises de vue sans compromettre la pose. L'ajout d'une deuxième poignée vous permet de mieux contrôler les mouvements complexes. Pour obtenir des séquences d'une fluidité absolue, pensez à combiner un slider ou un dolly avec le cardan : le mouvement mécanique combiné à la stabilisation électronique peut créer des effets cinématographiques.

Erreurs courantes
Même les photographes expérimentés peuvent gâcher une prise de vue fluide en commettant ces erreurs. Ne pas essayer de stabiliser manuellement une prise de vue déjà stabilisée. Tenir le cardan trop fermement peut transmettre des vibrations. Tenez-le de manière lâche et stable. La précipitation de la prise de vue nécessite des mouvements lents et prudents.
Une erreur particulièrement fréquente consiste à oublier de désactiver la stabilisation dans l'appareil photo ou dans l'objectif lorsque l'on utilise un cardan à trois axes. Plusieurs systèmes de stabilisation fonctionnant simultanément peuvent entrer en conflit et provoquer un effet de gelée peu naturel dans les images. Pour obtenir les meilleurs résultats, désactivez toujours toutes les autres fonctions de stabilisation lorsque vous utilisez un cardan.
Obtenir un aspect professionnel lisse
Maîtriser un look fluide avec un cardan 3 axes est à la fois une science et un art. Les aspects techniques - un bon équilibre, une configuration optimale et une bonne posture - constituent la base. Les éléments artistiques - mouvements créatifs, composition des plans et narration émotionnelle - sont ce qui élève votre travail à un niveau professionnel. N'oubliez pas que même les filmeurs Steadicam d'Hollywood doivent s'entraîner pour rester compétents.