Aufnahmen bei schlechten Lichtverhältnissen stellen für Benutzer eines 3-Achsen-Gimbal-Stabilisators eine besondere Herausforderung dar. Geringes Licht zwingt die Kamera dazu, längere Verschlusszeiten, höhere ISO-Werte und größere Blendenöffnungen zu verwenden, was sich alles negativ auf die Stabilisierungsleistung auswirkt. Bei schlechten Lichtverhältnissen müssen die meisten Gimbals eine höhere Motorlast bewältigen, um die längeren Belichtungszeiten der Kamera zu kompensieren. Dies führt häufig zu Zittern, horizontaler Drift oder sogar zu einer vollständigen Überlastung und Abschaltung des Motors. Professionelle Fotografen berichten, dass Aufnahmen bei schwachem Licht die effektive Stabilisierung um bis zu 40% im Vergleich zu gut beleuchteten Umgebungen verringern können. Der Schlüssel zur Bewältigung dieser Herausforderungen ist das Verständnis der Reaktionsfähigkeit Ihres 3-Achsen-Gimbals bei schlechten Lichtverhältnissen.
Optimieren der Kameraeinstellungen Ihres 3-Achsen-Gimbal-Stabilisators in Umgebungen mit schlechten Lichtverhältnissen
Die richtige Kamerakonfiguration ist entscheidend, um die Leistung Ihres 3-Achsen-Gimbal-Stabilisators in Situationen mit wenig Licht zu maximieren. Stellen Sie zunächst die Verschlusszeit auf mindestens das Doppelte der Bildrate ein, damit die Bewegung flüssig bleibt. Auch wenn Sie versucht sind, die Belichtungszeit zu verlängern, kann dies die Motoren des Gimbal überfordern. Erhöhen Sie stattdessen allmählich den ISO-Wert, um die höchste verfügbare Einstellung zu finden, bevor das Rauschen inakzeptabel wird.
Die Verwendung einer Blende stellt ein interessantes Gleichgewicht mit dem Gimbal dar. Lichtstarke Objektive sammeln zwar mehr Licht, aber ihre extrem geringe Schärfentiefe macht die Fokussierung zu einem entscheidenden Faktor - und das kann sehr schwierig sein, wenn sich sowohl der Fotograf als auch das Motiv bewegen. Viele Profis empfehlen, die Blende so weit wie möglich auf f/4 abzublenden, um eine bessere Schärfentoleranz zu erreichen und gleichzeitig eine hohe Fokussiergeschwindigkeit beizubehalten.

Auswahl des richtigen 3-Achsen-Kardan-Stabilisators für Aufnahmen bei schlechten Lichtverhältnissen
Die Kombination aus Kamera und Objektiv, die auf einem 3-Achsen-Gimbal-Stabilisator montiert ist, kann die Leistung bei schlechten Lichtverhältnissen erheblich beeinflussen. Während größere Vollformatkameras im Allgemeinen bei schlechten Lichtverhältnissen besser abschneiden, kann ihr zusätzliches Gewicht das Drehmoment des Gimbals an seine Grenzen bringen. Ein häufiger Fehler ist es, den Gimbal mit einem schweren Cine-Objektiv zu überlasten, was die Motoren belastet und trotz Bildstabilisierung zu verwackelten Aufnahmen führt. Als Faustregel gilt: Um die beste Leistung bei schlechten Lichtverhältnissen zu erzielen, sollten Sie die Gesamtnutzlast auf mindestens 15-20% der maximalen Kapazität des Gimbals beschränken.
Spiegellose Kameras haben sich zum Goldstandard für kardanische Aufnahmen bei schwachem Licht entwickelt, da sie eine hervorragende Leistung bei hohen ISO-Werten in einem relativ leichten Gehäuse bieten. Bei der Wahl des Objektivs sollten Sie sich für kompakte Primes und nicht für sperrige Zooms entscheiden. Denken Sie daran, Ihre Ausrüstung vor jeder Aufnahme perfekt auszubalancieren, denn schon ein geringes Ungleichgewicht kann bei schlechten Lichtverhältnissen zu größeren Problemen führen.
Fortgeschrittene Tipps zum Auswuchten
Bei der Verwendung eines 3-Achsen-Gimbal-Stabilisators unter schwierigen Lichtverhältnissen ist eine korrekte Auswuchtung von entscheidender Bedeutung. Die Standard-Ausgleichsverfahren sollten genau befolgt werden, wobei der Nickachse besondere Aufmerksamkeit gewidmet werden sollte, da sie bei schlechten Lichtverhältnissen am stärksten beansprucht wird. Ein Profi-Tipp ist, die Rollachse bei schlechten Lichtverhältnissen absichtlich etwas nach vorne zu verschieben, damit der Motor einen leichten mechanischen Vorteil hat, wenn er die Bewegungsunschärfe bei langen Verschlusszeiten ausgleicht. Bei vielen modernen 3-Achsen-Kardanische StabilisatorenDie manuelle Feinabstimmung führt jedoch oft zu besseren Ergebnissen. Versuchen Sie nach der automatischen Anpassung, die Motorstärke in den erweiterten Einstellungen des Gimbals um 10-15% zu reduzieren - dies kann die Leistung bei schlechten Lichtverhältnissen verbessern und eine Überkorrektur verhindern, die das charakteristische "Schwebegefühl" der Kamera verursacht.
Tipps für den Betrieb bei schlechten Lichtverhältnissen
Bei schlechten Lichtverhältnissen müssen Sie spezielle Anpassungen an der physischen Funktionsweise Ihres 3-Achsen-Kardan-Stabilisators vornehmen. In hell beleuchteten Umgebungen lassen sich gleichmäßige Bewegungen oft nicht gut mit langen Verschlusszeiten vereinbaren. Bewegen Sie den Gimbal daher bewusster und langsamer - denken Sie an das Gehen durch Wasser, um eine gleichmäßige Bewegung aufrechtzuerhalten. Halten Sie Ihre Ellbogen dicht am Körper, um eine stabilere Plattform zu schaffen. Für besonders schwierige Aufnahmen bei schwachem Licht sollten Sie eine Gimbal-Weste oder ein Easyrig in Betracht ziehen.
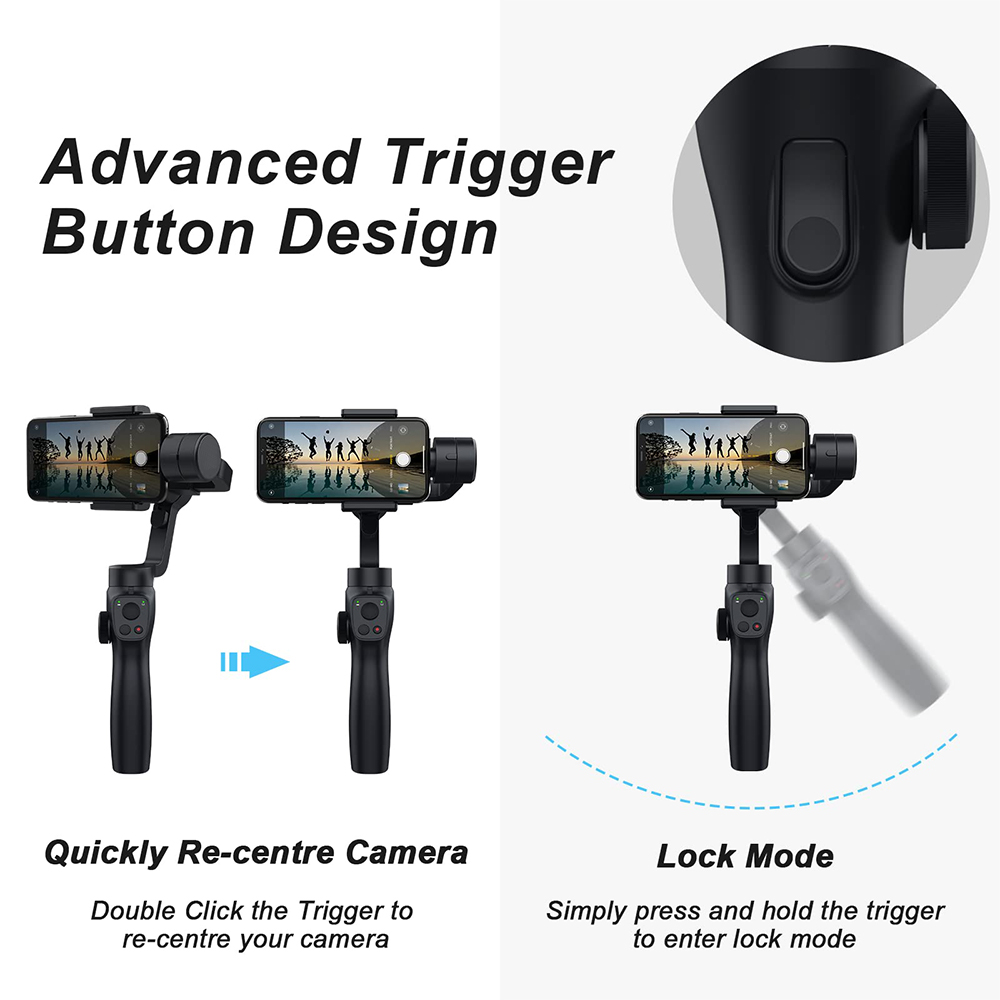
Nutzen Sie bei statischen Aufnahmen die verschiedenen Feststellmodi des 3-Achsen-Gimbal-Stabilisators, um Mikrobewegungen zu minimieren, die bei schlechten Lichtverhältnissen übertrieben wirken können. Viele Profis empfehlen die "Wirbel"-Technik für Aufnahmen von Schwenks bei schwachem Licht: langsam beginnen, in der Mitte sanft beschleunigen und am Ende langsam abbremsen.

Zubehör zur Verbesserung der Leistung bei schlechten Lichtverhältnissen
Einige Zubehörteile können die Leistung eines Systems erheblich verbessern 3-Achsen-Kardanring in Situationen mit wenig Licht. Eine kompakte LED-Beleuchtung an Bord kann für genügend Aufhelllicht sorgen, um die Verschlusszeit angemessen zu halten, ohne die Szene zu stark zu verrauschen. Für Dokumentar- oder Eventaufnahmen sollten Sie eine Hybridhalterung in Betracht ziehen, die den Gimbal mit einer Schulterhalterung kombiniert, um die Stabilität bei langen Aufnahmen bei wenig Licht zu erhöhen. Fokussiersysteme sind besonders bei schwachem Licht wichtig, da die manuelle Fokussierung auf ein sich bewegendes Motiv mit geringer Schärfentiefe eine Herausforderung darstellen kann. Gegengewichte können ebenfalls hilfreich sein. Durch das Anbringen kleiner Gegengewichte an den Griffen des Gimbals kann die Trägheit erhöht und ein leichtes Verwackeln der Hand reduziert werden, das bei Aufnahmen unter schlechten Lichtverhältnissen leicht zu spüren ist.
Low-Light-Leistung mit einem 3-Achsen-Gimbal meistern
Um mit einem 3-Achsen-Gimbal bei schlechten Lichtverhältnissen professionelle Ergebnisse zu erzielen, bedarf es einer Kombination aus geeigneter Ausrüstungsauswahl, sorgfältiger Einrichtung, geeigneter Aufnahmetechnik und durchdachter Nachbearbeitung. Der Einsatz eines Gimbals bei schlechten Lichtverhältnissen ist zwar eine Herausforderung, bietet aber auch einzigartige kreative Möglichkeiten, um Ihre Arbeit hervorzuheben.

